#HandsOnTalend – Integration Cloud – Your First Job – Best Practice and Metadata
As we learnt in our last article, the process of creating a project and creating a workflow is quite simple, however, the most important part of the flow will always be the Job. Whereas not directly, part of Integration Cloud, it is an important element within it.
When it comes to Job, we can always look at the following image to understand what best practices tell us.

This image is part of a 2017 article by Talend themselves on best practices which can be found here: https://www.talend.com/blog/2017/01/05/talend-job-design-patterns-best-practices-part-4/
As can be clearly seen, the first part/ or segment refers to the PreJob components. PreJob components, as the name suggests, are job components that are executed before the main Job. Typically, in Integration jobs, you would expect the PreJob components would be connections to the source and target systems, although this is not always the case.
The main Sub-Job is the area where your main job components are laid out and built as a workflow which is then executed.
You would then look at closing off the connections initially created. This is all part of the PostJob orchestration component which composes the last components to execute after the main sub-job has completed.
For our Example, we will be picking up data from one database and we will be dropping a backup in csv format in an AWS S3 bucket.
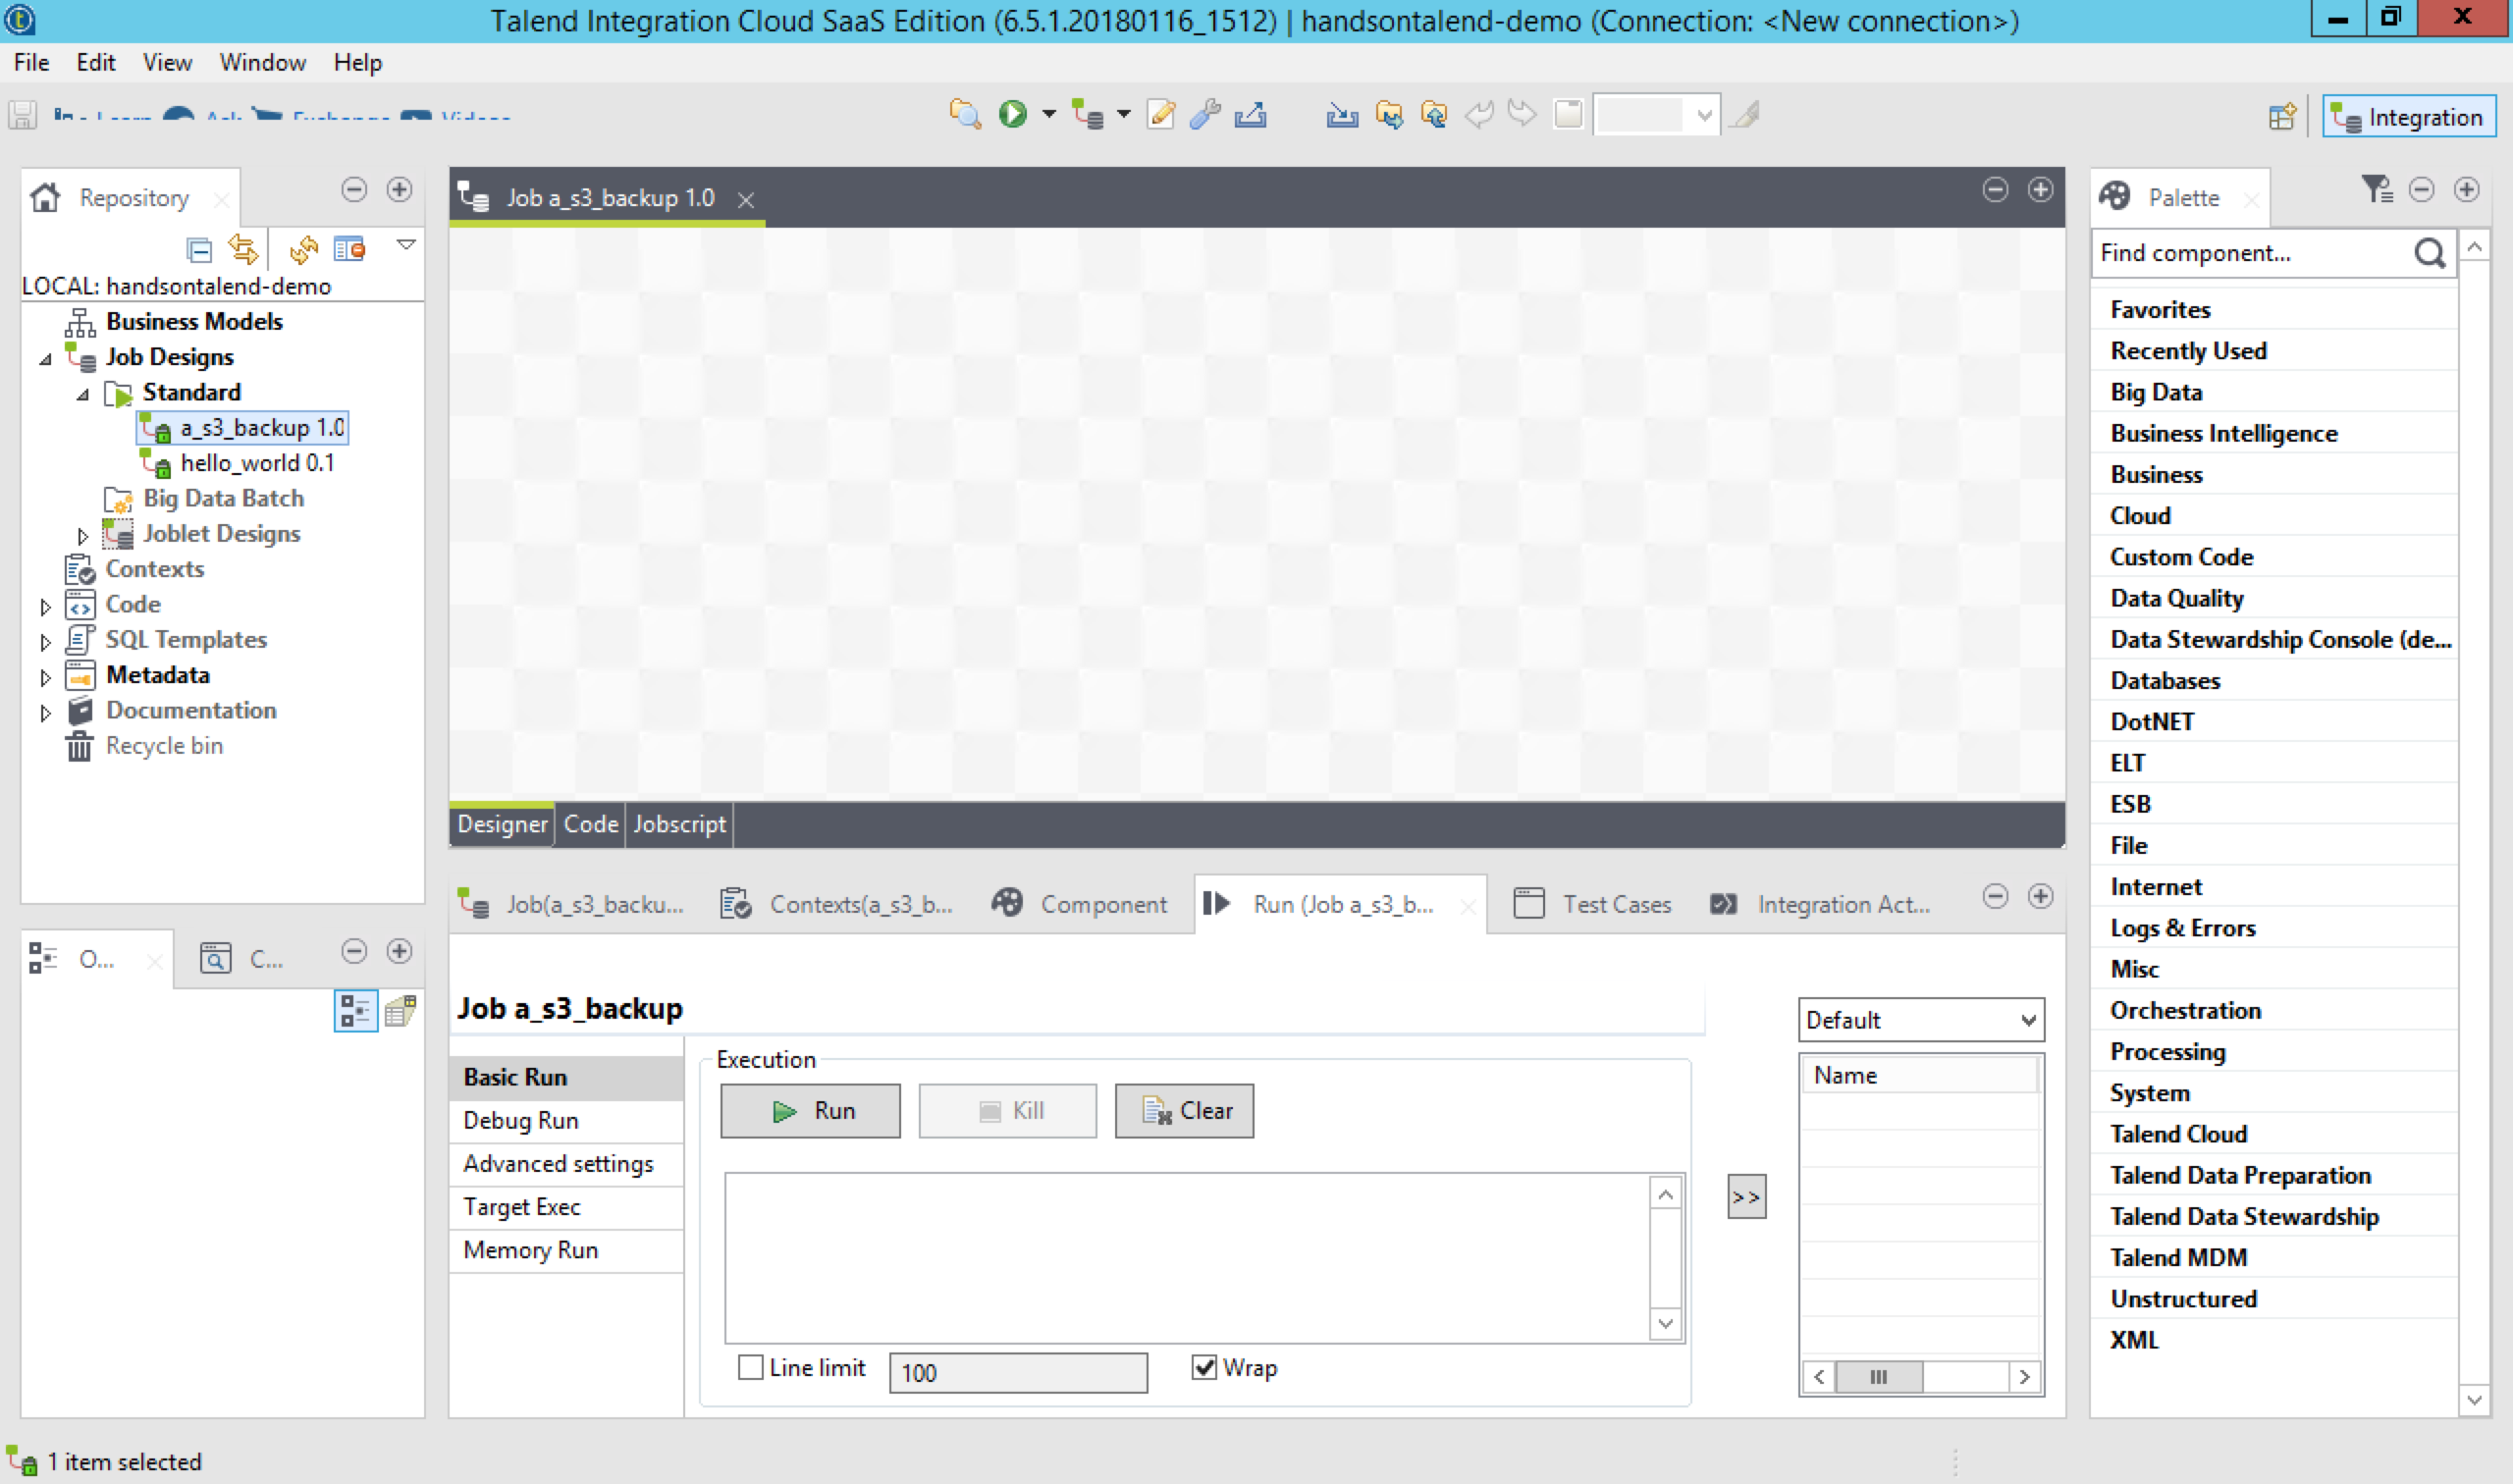
The first thing that needs doing is opening Talend Studio and creating a new job, the following is an example: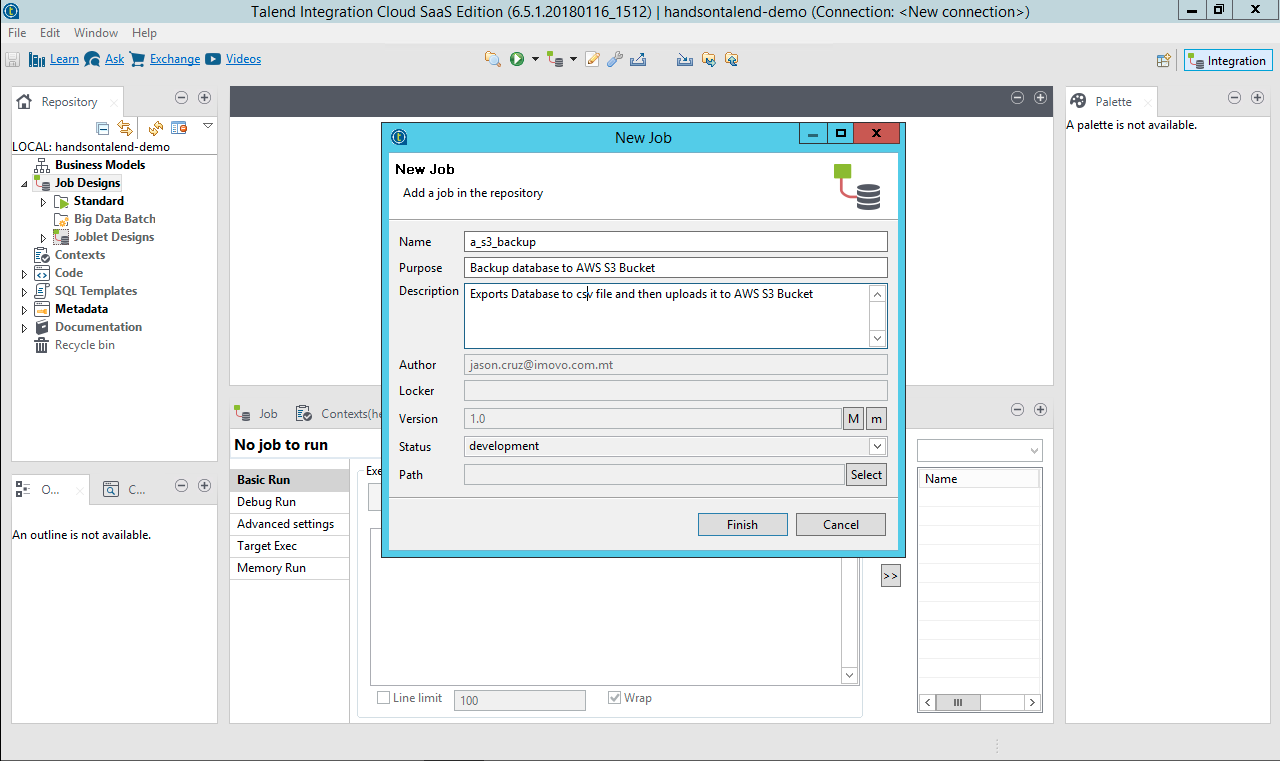 Once you have created the Job, the Studio should look like the image below, and that only means one thing, it’s time to get to work!
Once this has been done we need to make sure we have our connections in our Metadata tab updated.
The importance of metadata is undeniable, especially when it comes to the management of connections and schemas across multiple components within multiple jobs.
Essentially, metadata management, although quite simplistic with Talend Studio, can help you grasp the importance of making sure your metadata is kept up to date and documented. Although by far, not a comprehensive guide, I will aim to show you how simple it is to list your Db Connections, and in our next article, how to bring it into the view and work with your metadata.
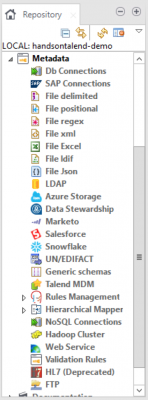 At this point, to start off, you need to make sure you have added your source database configuration. This can be done by right-clicking on Db Connections and selecting Create Connection.
You should be greeted with the following:
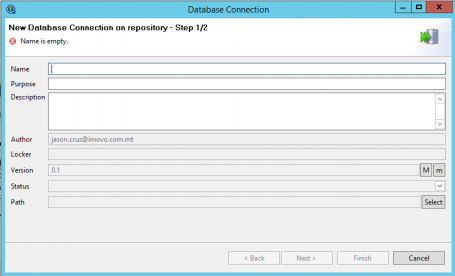 Make sure you describe and name these appropriately as this would help you identify them easily. Talend by default will organise metadata in an alphabetical order. Typically I like to choose the order how the db connections added within the metadata tab appear, so my advice would be to add a letter, typically, this would look like; a_dbconnection_location (e.x. a_mmsql_desktopabc).
The next screen is where you will be adding your configuration settings:
Once you have selected the database, which for our demo will be ‘Microsoft SQL Server’ the initial Connection String will appear. As you fill in the details required, the connection string will update. Here you can note that the connection string is a JDBC connection string. With older legacy systems you may be looking for an ODBC connector, unfortunately, you won’t be able to find one.
As of Java 8, ODBC is now unsupported, given that Talend is Java based, this means that ODBC is now no longer supported by Talend either. There are workarounds, but my honest advice is to move on, adapt and stick to JDBC.
Moving on, once you have set up the connection, you will see it on the list. The next step would be to right-click and select Retrieve Schema.

What this does is it allows you to run a search for Tables and Views and slightly more.
This is the next step:

Once You have selected the name filters and the types you want to search for, select ‘Next’. This will then bring you to the next part where you can select the main database where the Schemas reside and select which Schemas you want to bring into Talend Studio.
Once you have imported all of your Db Connections and Retrieved the Schemas, the same can be done for Delimited Files (CSV). The process here is exactly the same.
From here on now, stay tuned till next week where we will see what can be done with the metadata we have set up and how Jobs and SubJobs are built!